Patchwork Projects: Garden Party Quilt

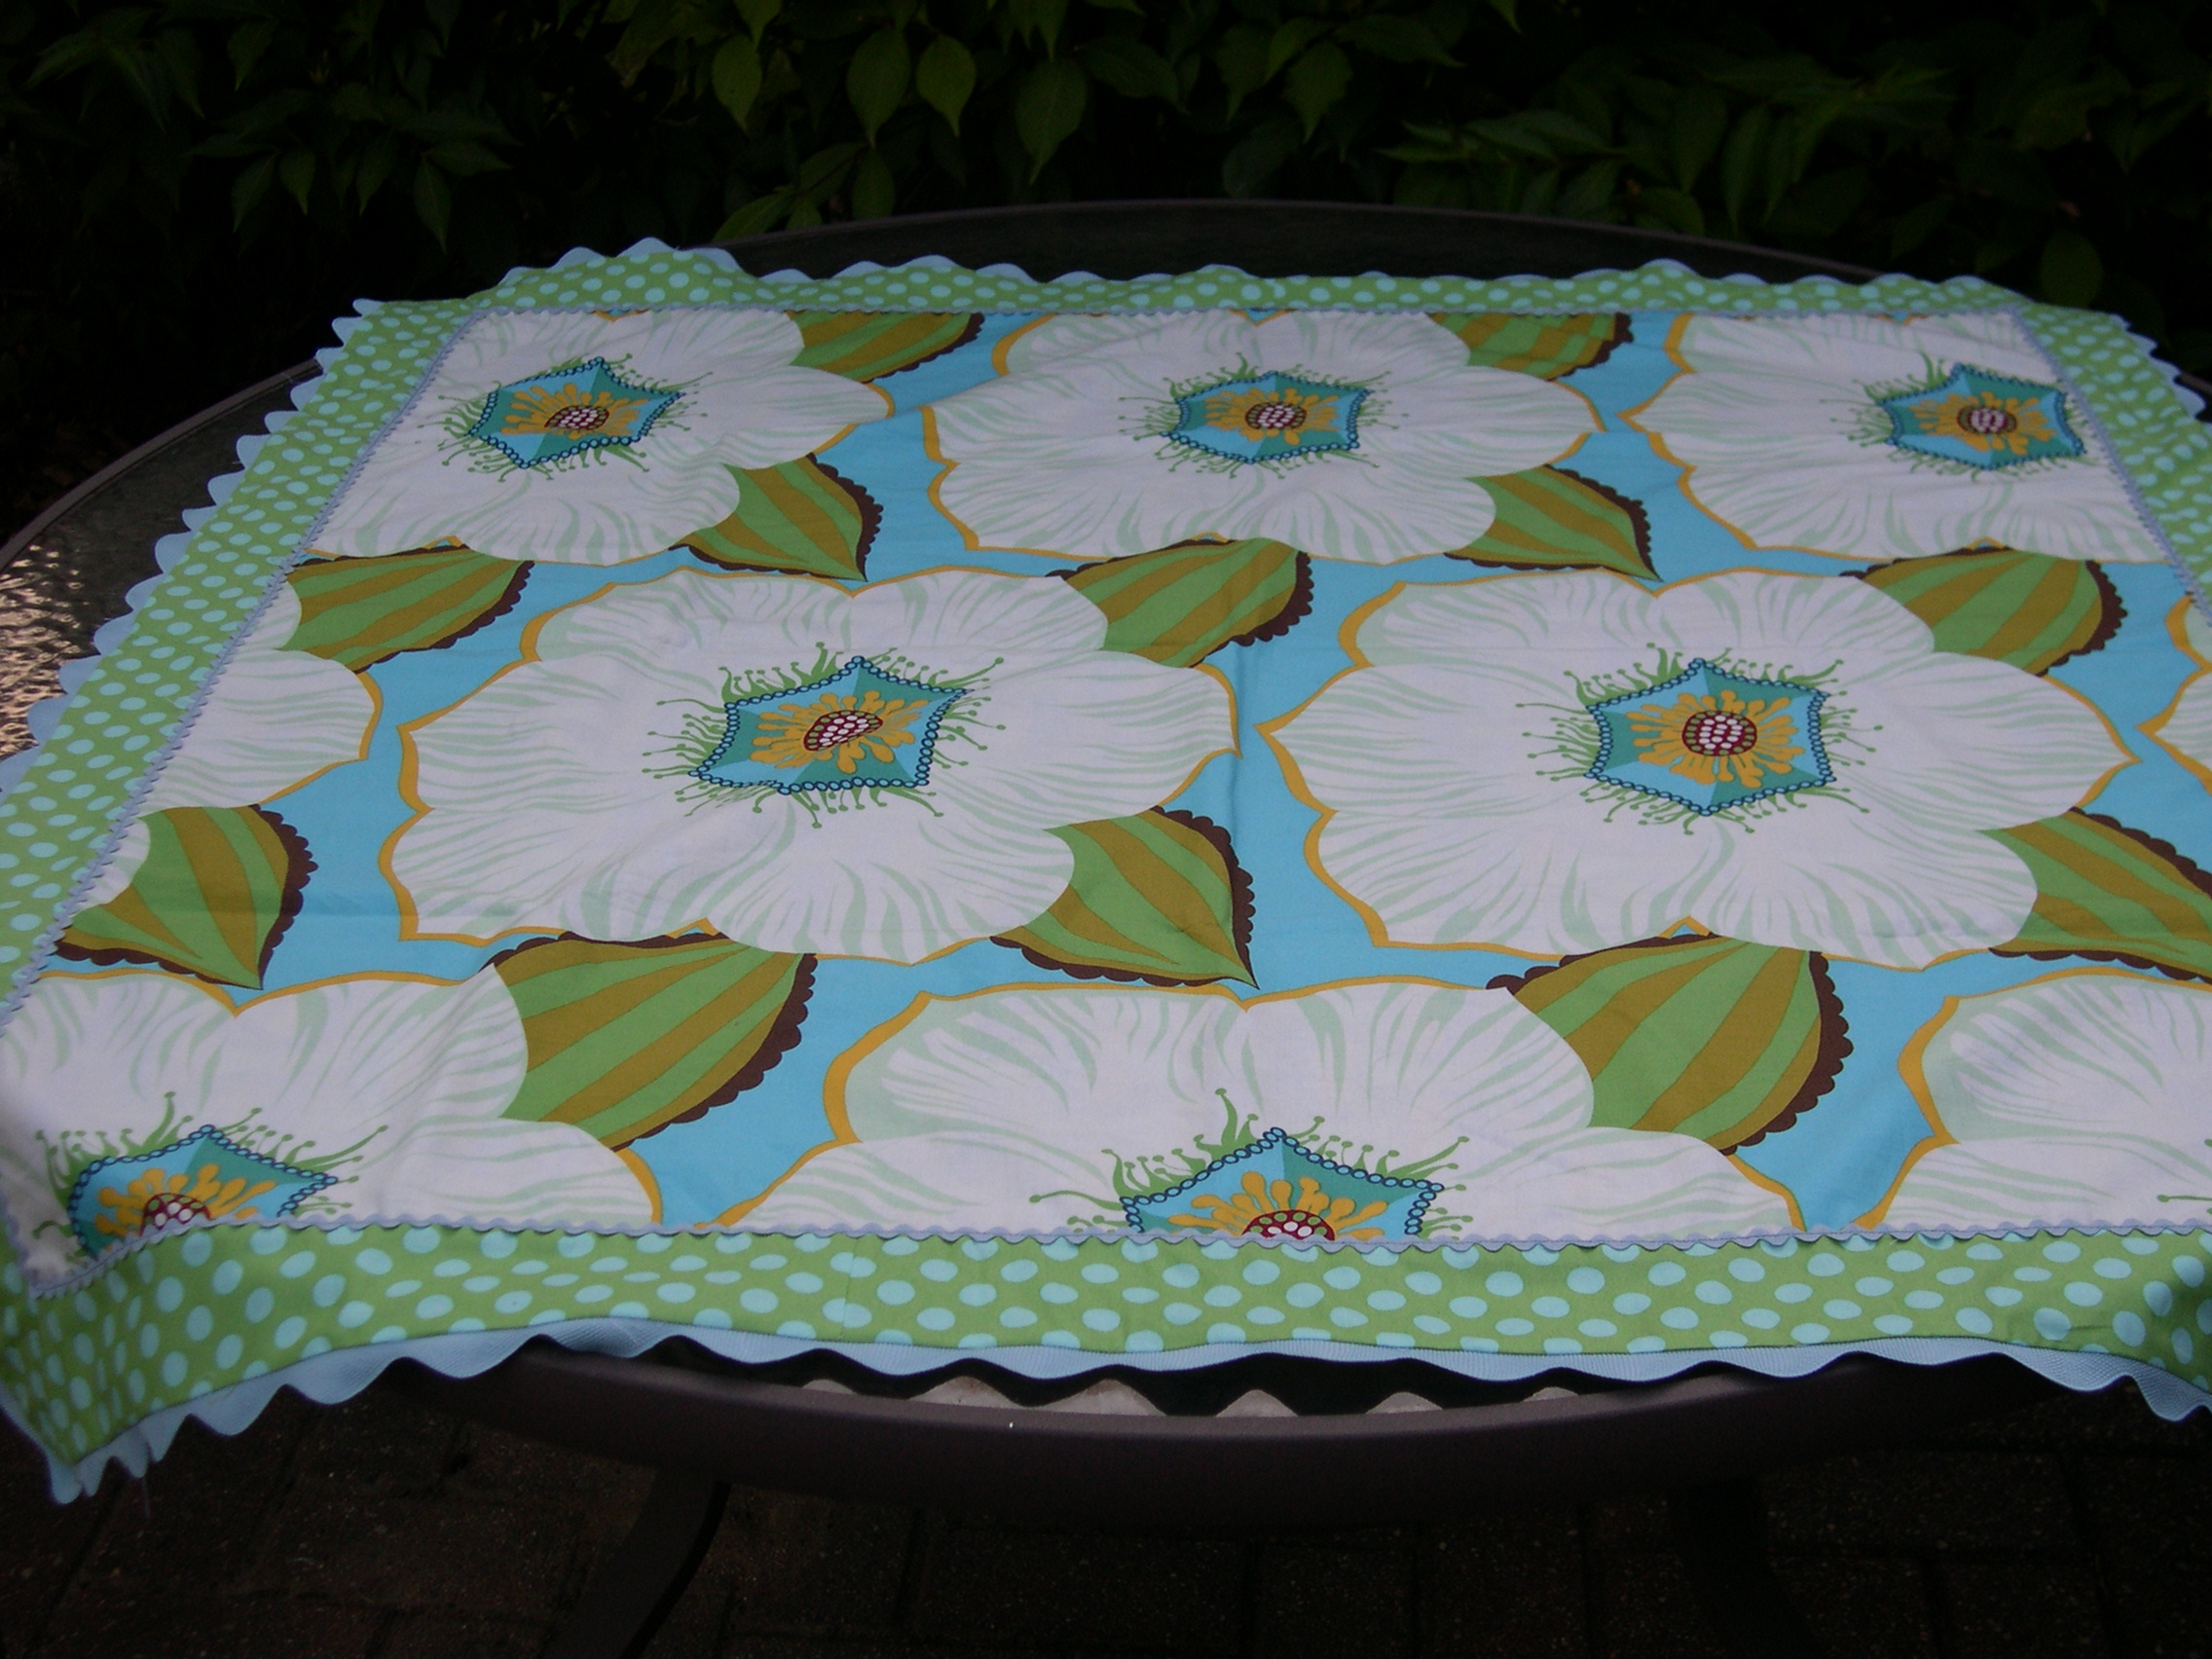
I am so excited to show you my finished Garden Party quilt!

garden party quilt

A former quilting bee I used to belong to helped make some of the blocks using this tutorial for a “2.5 Times Around the Block” quilt block. I wish I could have made it a little bigger but my stash of the red mingling and ice mingling prints from the Garden Party fabrics designed by Anna Maria Horner was quite limited.

garden party quilt top

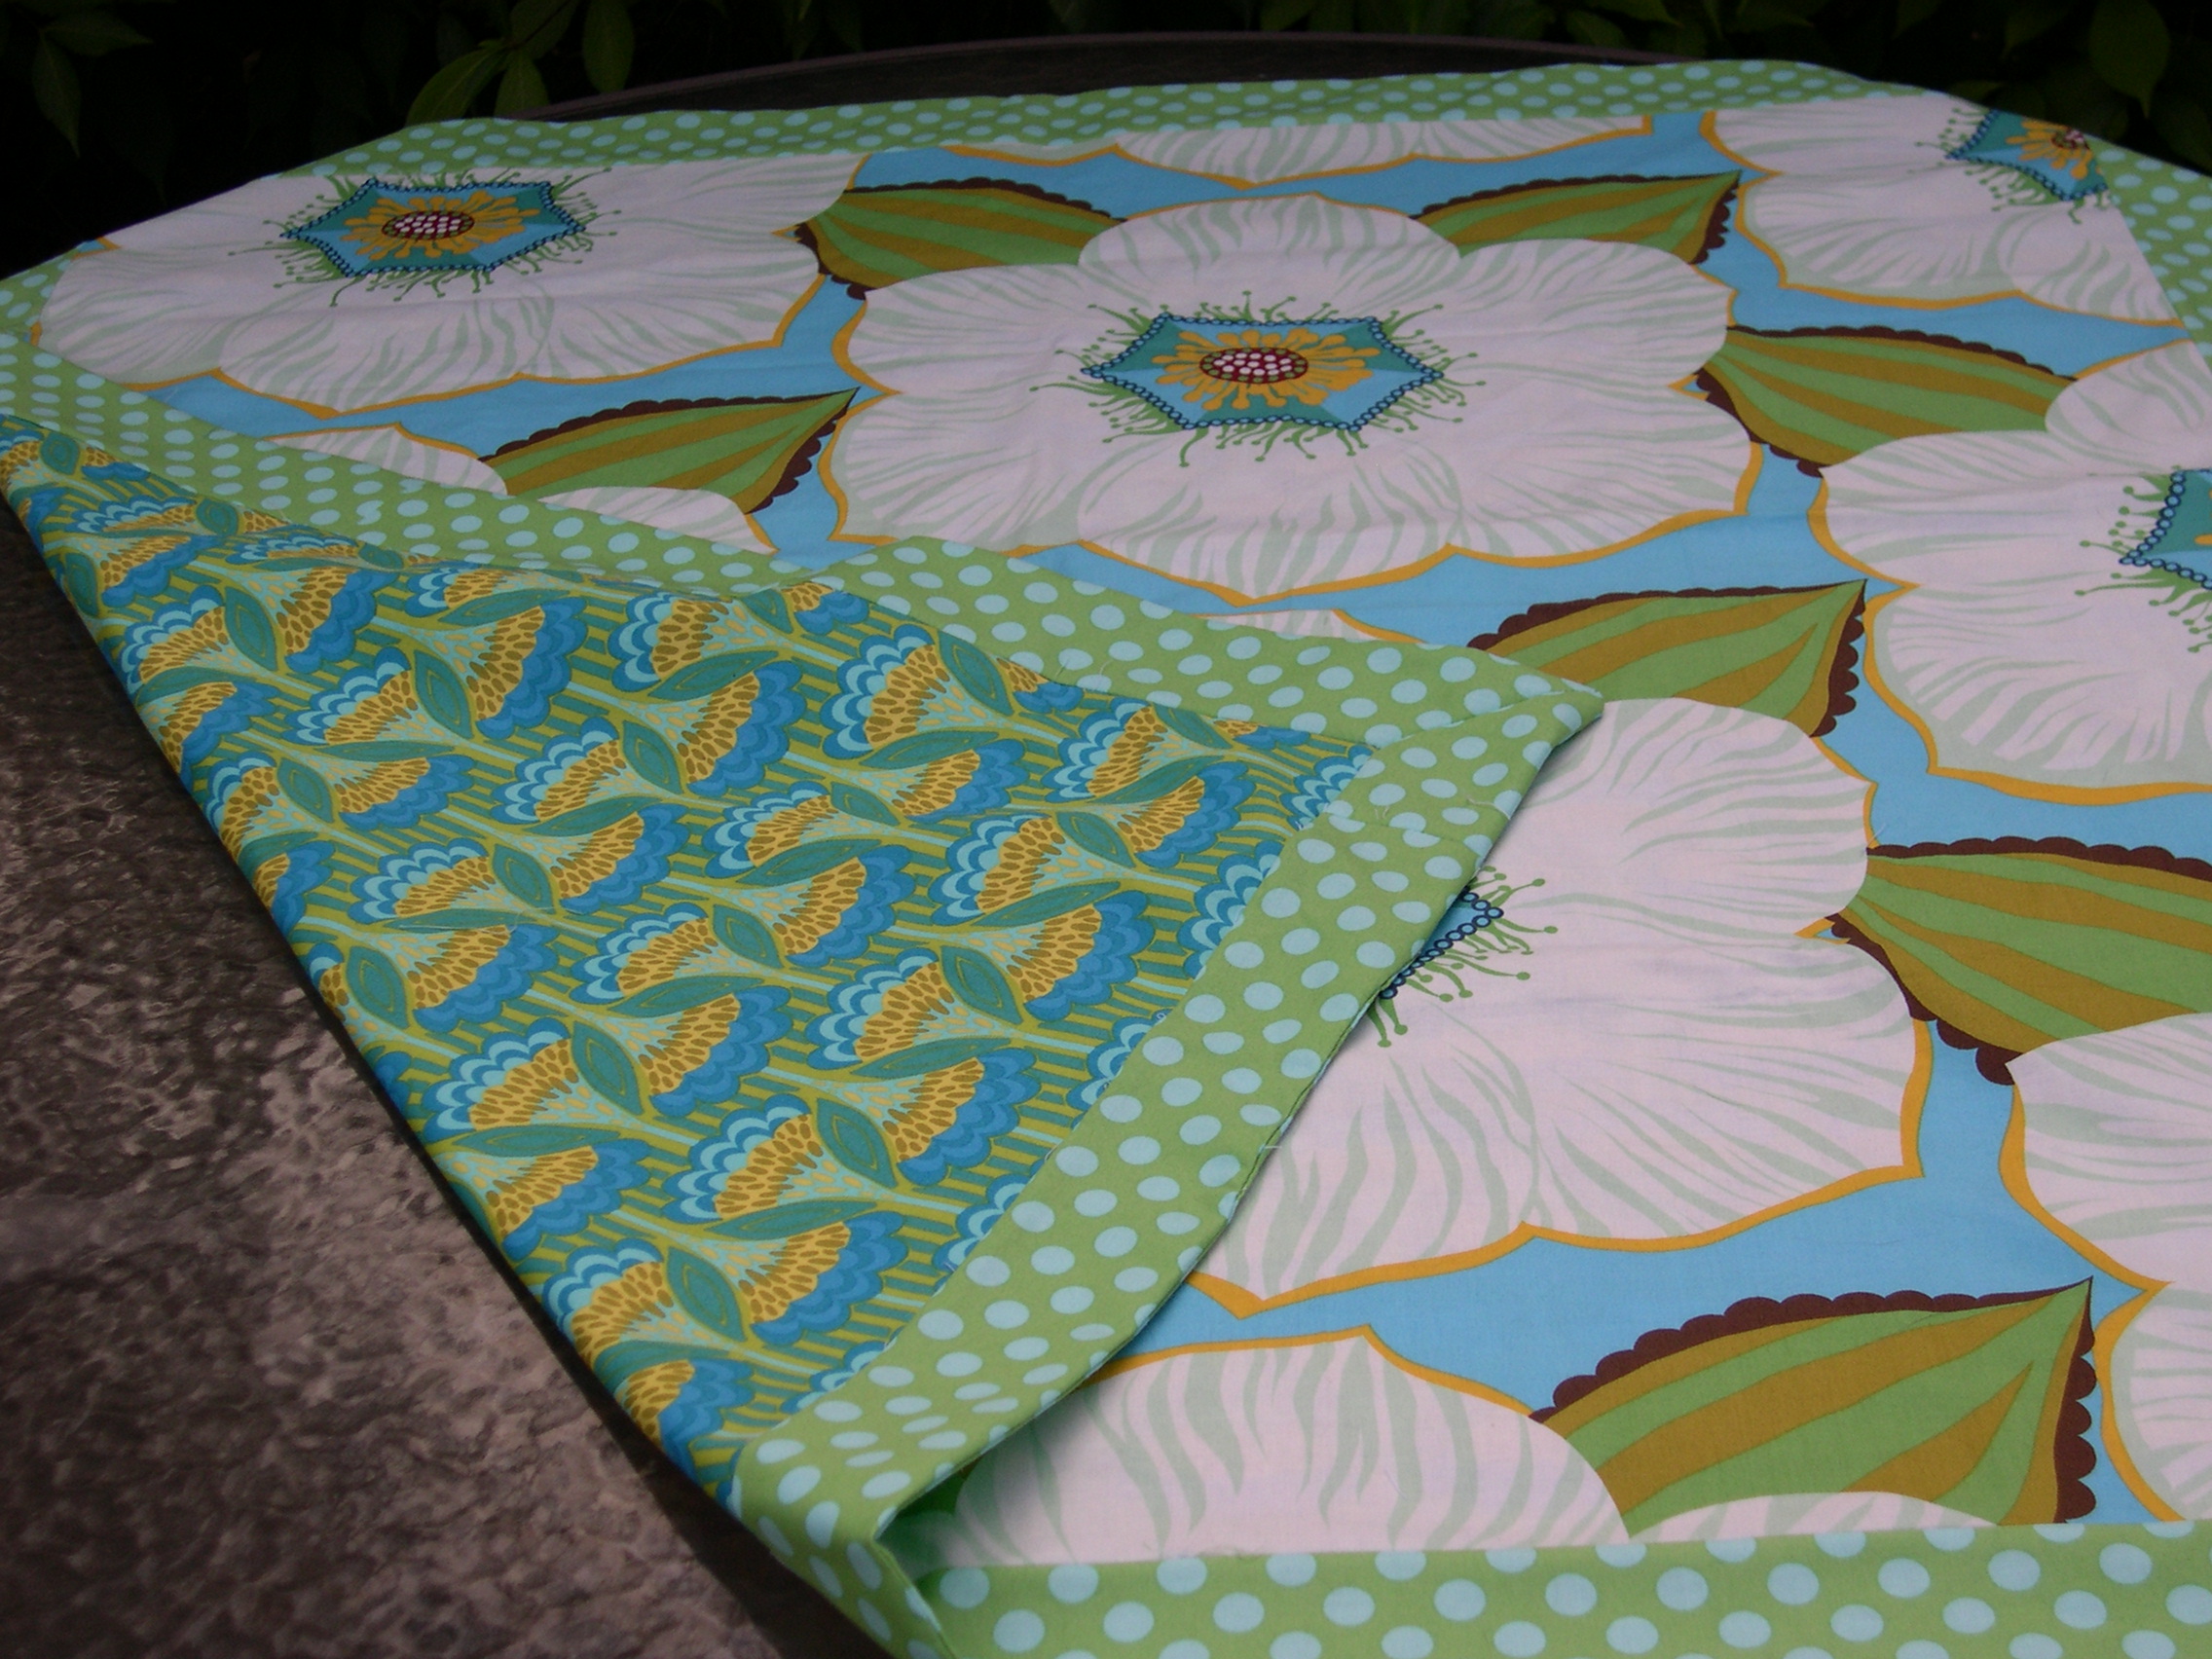
The backing is all about the turquoise centerpiece print!garden party quilt back

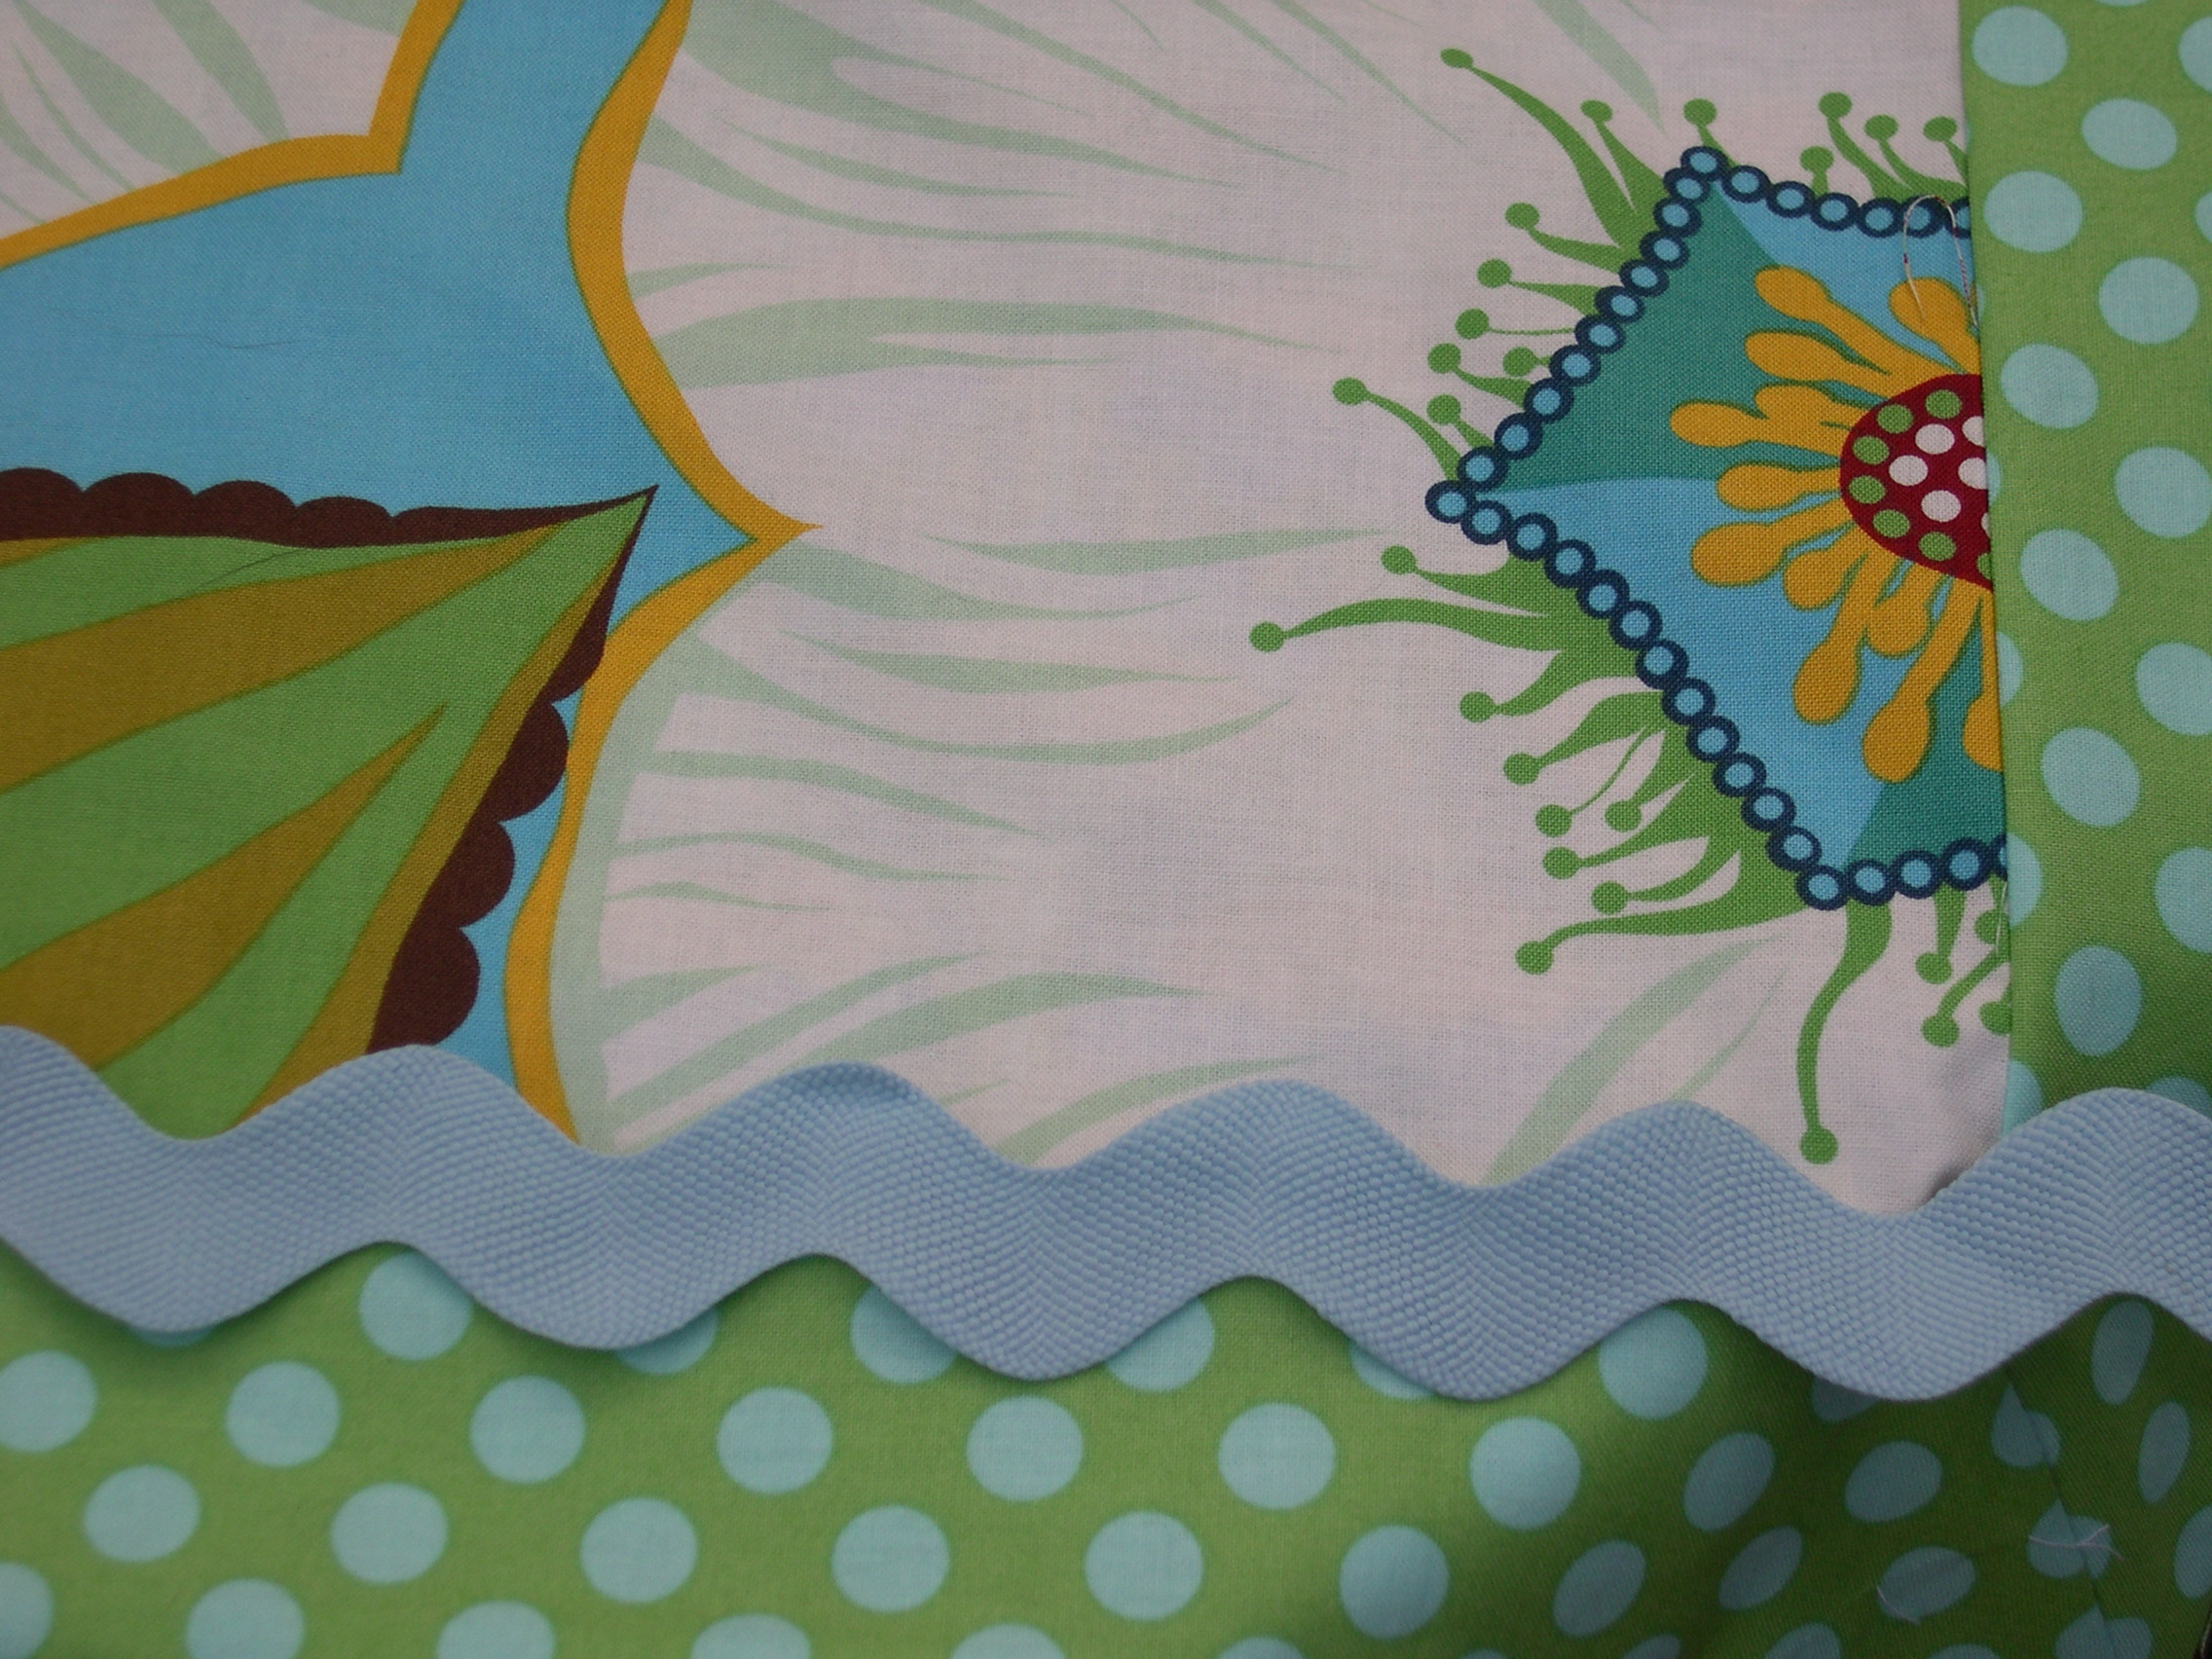
My friend Julie, a professional long-arm quilter, did a beautiful job quilting it.

garden party quilting

garden party quilt

I can’t even begin to tell you how excited I am with this quilt! I started making it about three years ago with a quilting bee I belonged to at the time, and it’s one of the few quilt finishes I’ve had in a looong time. Projects like this are one of the many reasons I love sewing and wanted to learn how to design fabric, sewing patterns and surface patterns.

Terri

Stats:
Block: 2.5 Times Around the Block
Size: 42″ wide x 55″ high
Fabrics: Garden Party fabrics designed by Anna Maria Horner  

A Garden Party

I squeezed in some time this week to sew together the remaining blocks I was missing for my Garden Party quilt project.

I’m so excited to have it all sewn together! I love how bright, bold and colorful this turned out.

I was able to scrounge enough of the red fabric from my dwindling garden party stash to add a border. I think it looks so much better with the border.

It turned out to measure about 43 inches wide by 56 inches tall, which will be a great size for a lap quilt.

I have the backing and binding all ready to go; just need to pick up some batting to quilt it.

It would be so awesome to finish this by the end of the year. In the meantime, I’m so happy I got this far with it.

On My Design Wall – Bee Blocks

I have received 10 of 12 blocks from my quilting bee partners to make my Garden Party quilt.

A couple blocks came back smaller than the directions, so I will likely end up taking those apart and resewing them together to make sure they are the same size as the rest of the blocks. Since I don’t have much fabric from this collection in my stash, I don’t have a lot of wiggle room to make additional blocks. I’m hoping to get the other two missing blocks back soon, and I’ll be ready to piece this burst of color together.

Garden Party Trays

I love to make little buckets, cubes and trays to store things in. When I saw Jennifer’s latest fabric focus project on Sew, Mama, Sew‘s site, I thought it looked like a fun, quick project to try.

I haven’t used any of the garden party fabrics in my stash for awhile, so I figured they would be good samples to try this pattern.

It was fun to fussy cut the large flower print for the center of each tray.

These trays work great to store loose little things, like bobbins, buttons, hairclips, paperclips, snippets, yarn, coins, or other small objects you collect.

Now comes the part where I reveal to you my obsession for lip balms! (I really hate wearing lipstick.) I have them scattered all over the house, two in my sewing room, two in the bathroom, one in the kitchen, one in my car, one in my purse. And I like a variety of flavors, from chocolate to cherry to pina colada.

Getting back to the pattern, it’s super easy to follow. It’s comes out to be a 4-inch box, but you could customize the size for your needs. You could make one of these gems in less than an hour. I think it took me longer to pick out which fabrics to use than it did to actually make one. I encourage you to look for some fun little objects in your house that you collect and find some accompanying fabric to build a tray to store them in. It’s very satisfying!

Nine-Patch for Swap

Anina is hosting a 9-patch swap, and I was lucky to get in on the action. She limited the swap to the first 50 people, and I think it filled up fast. I have always wanted to participate in a quilting bee or a quilting swap, but I’m never in the invitee list, or I miss the sign-up deadline.

three by three by twiddletails.

The plan is to make 16 nine-patch blocks which are 6″ finished, and mail them to Anina by May 31.

9-patch blocks for swapDone.

Then we have to make another 16 blocks to send to Anina by June 30.

Second round of 9-patch blocks for swapAlmost done.

At the end we will have 32 blocks from other swappers to make into our own quilt, unless people want to continue for another month to get 48 blocks total. I can’t wait to see what other swappers are making!

Stash Bags

I made a couple makeup bags from Amy Butler’s Stash Bag pattern, which I really liked. The directions were easier to follow than I expected, since this was my first time making pleats.

Here’s the large stash bag with a handle (making it a wrislet, right?):

After some time has passed of NOT using this bag, I decided I didn’t like the handle.  It just seemed too stiff and too big to use this one as a makeup bag. But I liked how the pleats turned out on this larger bag. Here’s a peak at the lining:

Here’s the small stash bag:

I’m not crazy about the pleats on this smaller stash bag, making it seem like there’s too much fabric.  I’m not so sure about this size . Here’s a peak at the lining in the small stash bag:

I gave the pattern another chance this past week, thinking mabye I just didn’t care for the smaller size.  I don’t often make a pattern multiple times, but I made these two bags thinking I would use them as makeup or travel bags.

Garden Party makeup bags

I like how these turned out, and still need to finish hand-sewing the place where the zipper ends get sewn over and hidden inside the fabrics.  I plan to use these, but I am going to brainstorm some other ideas because I wasn’t happy with how the zipper ends turned out, not very neatly tucked inside.  The directions weren’t very helpful in getting those ends neatly sewn with all that bulk.

Has anyone tried any other zippered bag designs or patterns you would recommend?

I Got Stuck

I made a lot of progress on my table runners last weekend, pieced, pinned and ready to be machine quilted.  But then I got stuck.  If you have a pet, you can appreciate my dilemma.

Callie on my tablerunners

So I decided to make something else – how about a quick book bag!

Garden Party Book Bag

I made this book bag in less than an hour, no, really, less than an hour.  I based this on Randi’s tutorial but made mine a little bigger to fit a magazine or two.  Have I ever mentioned how much I love magazines? I LOVE magazines.  So this size works good to carry my magazine(s) to the cafe.

Book bag - inside

I also added a crochet flower from my stockpile for pop and accent.

crochet flower

Making this bag gave me the idea to make another one sized to fit my laptop, but equally as pretty.  I was encouraged when I read beki’s creative process for tweaking her bags.  I’m going to work on that next weekend, maybe after Callie gets off my table runners so I can finish them!

My Weather Wish

The weather in Wisconsin often dictates our weekend plans. This weekend we were hoping to go hiking again and to our favorite pub for lunch. But it was overcast and rainy for two days. Know what that meant? I worked non-stop on sewing projects! Here’s my to-do list:

Finish sewing the binding on this crayon roll in Farmers Market fabrics from the October 2008 issue of the American Patchwork & Quilting Magazine:

Done.  I think this turned out so cute! Makes me want to go color.

Finish sewing this chocolate lollipop tote using a pattern by Film in Fridge:

Done. Great tutorial, by the way. This one is a little bigger than the other totes I’ve made, but I think I can fill it quite easily. (wink wink)

This project was not on my list, but the fabric was cut and ready to be sewed together, so I also finished making two more pillowcases. I love how these turned out! This project makes me want to lounge in bed longer!

Because I’m only 5’5″, I always have to shorten new pants, so I have these two pairs that need to be shortened before I can wear them for work, which I really hate doing, which is why this one cannot be checked off my list yet (darn it):

Sometimes I secretly wish the weekend will be rainy like this so I can spend it in my sewing room. Got my wish this time!

Tablecloth for a Garden Party

*UPDATE: Thank you everyone for your comments on how to finish off this tablecloth! Would you believe I took it apart, added small ric-rac trim over the border on the top piece, added wide ric-rac to the seam and sewed the top and bottom together.  I love the new and improved tablecloth!  Check out new photos!

I ordered one yard of this fabric and this fabric, originally thinking I was going to make a tote bag. However, the size tote bag I had in mind was a little to small for the large print on the Guest of Honor fabric. Instead, I made a tablecloth for our patio, perfect for a Garden Party!

The top side is made from Guest of Honor fabric in ice.

The reversible other side is made from Fanfare in green. The border is from Polka Line in green.

I squared up both main fabrics to be an even 36-inch square. Then I attached 2-3/4-inch border strips to each side of each main fabric, mitering the corners. Then I layered the two main fabrics with attached borders right sides together and stitched all the way around, leaving a 3-inch opening. I trimmed the corners and turned the fabrics right sides out, pushing the corners out for a pointy finish. I hand-stitched the opening closed and pressed. Finished. Super easy.

I do have a question I need help with on finishing this finished tablecloth: should I leave the tablecloth as is (shown above) or add some rick-rack trim over the seam joining the border to the main fabrics (shown below)?

We have a tie here in our house. I want to add the trim but Dave says leave it off.

My other question is this: if I add the trim, how do I sew the rick-rack neatly around the corners? Should I cut it to fit each side, fold under the corners, and miter them? I have only added rick-rack to the inside seams so that it sticks out from the right sides of the fabric (as in a pillow cover).

Thanks for your help! Now let’s get together for a late-summer garden party.