Dresden Color Wheel Mug Rug Tutorial

(Please ask for permission to use my photos from this post beforehand.)

I had a lot of fun making mini Dresden color wheels this past week, so I wanted to share a quick tutorial on how to make your own. I backed this one with felt to use as a mug rug, which really brightens up my work space and makes me happy!

dresden color wheel mug rug

dresden color wheel mug rugs

After choosing fabrics from your stash, cut about 20-21 wedges (I used 20 wedges in the sample above and 21 in the sample below – use your own judgment to see what you can make work), using one of the smaller measurements on the Easy Dresden Template designed by Darlene Zimmerman (got mine from Joann’s). For the examples pictured here, I used the 1-1/2″ and the 2″ positions to cut my 20 wedges.

cutting dresdens

Fold each wedge in half the long way and stitch along the top, using a 1/4″ seam allowance. Turn right side out to form a point at the top.

turning dresden plate right side out

This is a great step to chain-stitch the pieces together.chain stitchingLay each wedge right side together, and stitch all the wedges together to form a ring, using a 1/4″ seam allowance. Press seams open.

sewing dresden plates together

dresden plates sewn into a circleMeasure the inner circle and add 1/2″ to 3/4″ to each side for the seam allowance. Cut a circle from paper or plastic to use as a template; cut 2 circles from your center fabric.

measuring inner circle

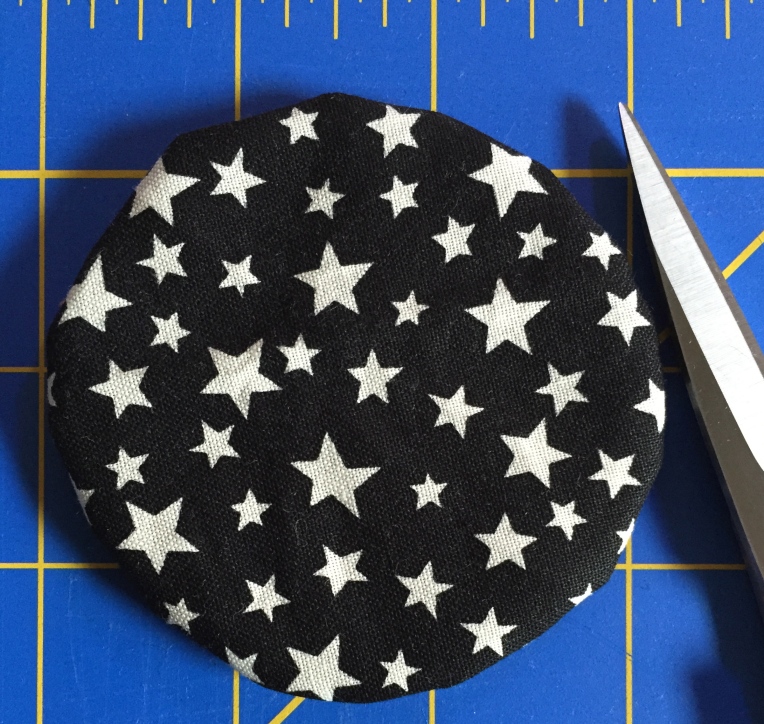
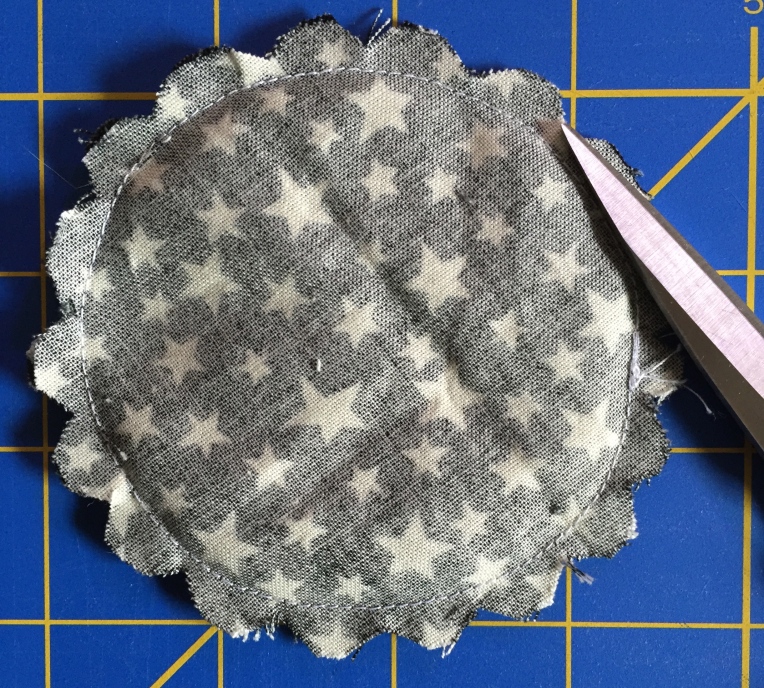
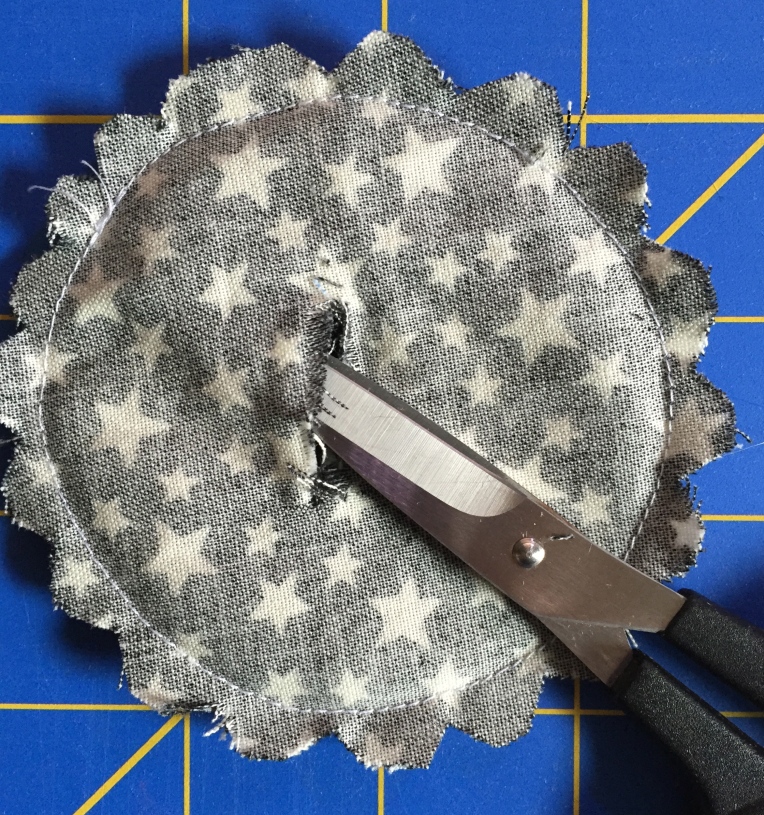
For these smaller dresdens, I cut circles that measured 4″ to 4-3/8″. With right sides together, stitch the two circles together using a 1/4″ seam allowance. Cut notches in the seam allowance to reduce bulk. Pinch the fabric on one side of the circle and cut a small slit. Pull the fabrics through that slit to turn the circles right side out. Press.

circles right sides together

cut notches in seam allowancecut slit in circle for turning

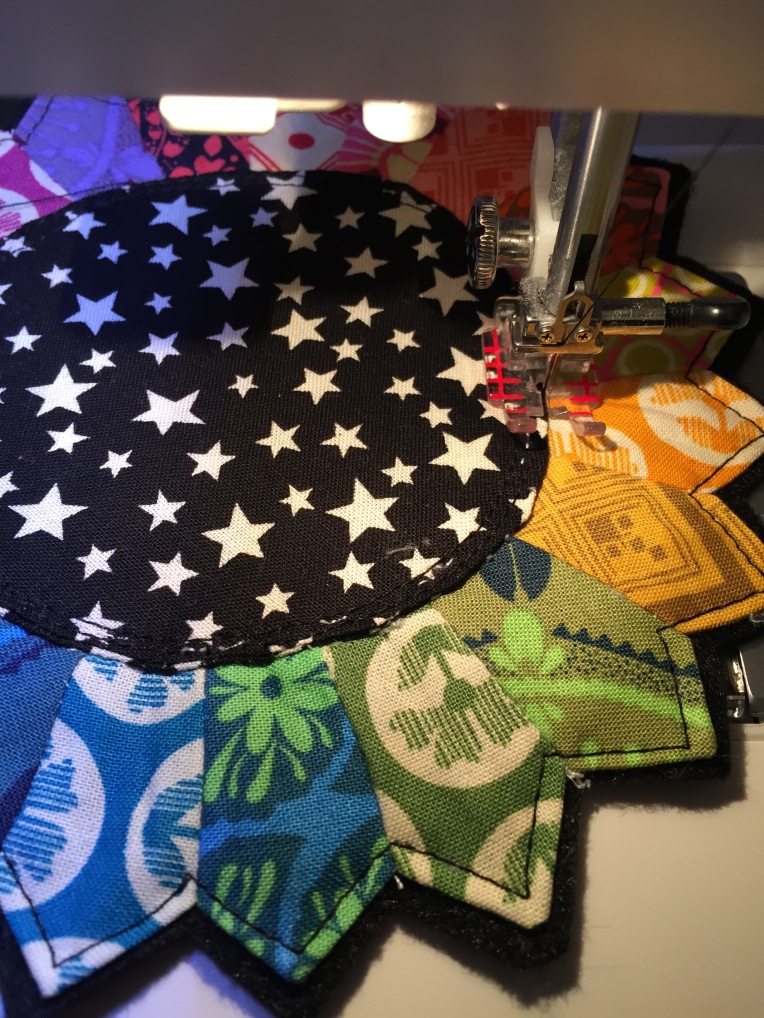
circles sewn togetherLay the fabric circles on top of dresden ring, pin if necessary, and top-stitch to attach to ring of the wedges. I top-stitched twice to make sure it was secure.

dresden color wheel mug rug

Lay the dresden on a piece of felt for backing and top-stitch 1/8″ in around the points and valleys. Trim the felt close to the points and valleys.

felt backing for dresden color wheel mug rug

Stitch in the ditch around the circle to fasten more securely to the felt backing.

dresden color wheel mug rug

Happy sewing, my friends!

Terri

PS – Note: Because I create with human hands, my cutting is never perfect. My sewing is never perfectly straight. My circles aren’t perfectly symmetrical or even. And I always have threads to trim. Please forgive me for that 😉 This is just a fun project I was excited to share. I’m sure there are many ways to make this; I’m just sharing my concept and process here.

Simple Coffee Cozy Tutorial

I have always wanted to know how to make a coffee cozy, especially after receiving a coffee to-go recently with this dreadful styrofoam cozy!

I thought it would be fun to have a cozy in my own little signature patchwork style, so I documented the steps in case you want to make one for yourself or as a stocking-stuffer gift.

Supplies:

Strips of fabric

Fabric for lining

Fusible interfacing or batting (depending on how puffy you want your cozy)

Velcro and a cute button

Paper, pencil, ruler

Usual sewing tools (ruler, rotary, thread)

Making the pattern:

1. Trace your coffee cozy template, using a sample from your favorite coffee shop.

2. Add 1/2 inch all the way around and connect the dots or dashes.

3. Cut out your new pattern.

Piecing Instructions:

1. Lay out your strips and sew them together in a patchwork fashion like this. Press seams flat, either to one side or open, whatever your preference. (It’s just a cozy, so it doesn’t matter which direction you press the seams.)

2. Using your new pattern, lay over your interfacing or batting and cut out. Lay it on the wrong side of your patchwork, fuse or pin, and cut out. (save that scrap patchwork for a future project.)

3. Quilt your patchwork. I just stitched 1/4 inch in from each seam allowance.

4. Using your new pattern piece again, cut out your lining fabric the same size as your patchwork piece.

5. Lay these two layers right sides together, pin, and stitch using a 1/4 inch seam allowance. Leave an opening for turning.

6. Turn right side out through the opening.

7. Tuck in the opening, press layers so seams are flat, and top stitch about 1/8 to 1/4 inch in from the edge.

Closure:

1. I used a couple of these velcro tabs for the closure because they were easy, inexpensive and forgiving as far as perfect alignment.

NOTE: before stitching the velcro tabs, you might want to make the marks on both the right side and lining pieces and then try on the cozy to test the placement.

2. Lay your patchwork cozy flat with the lining facing up. Measure in about 3/4 inch from the edge and make a dot with a pencil. Center one tab of the velcro over this dot and stitch.

3. Lay your patchwork cozy flat with the right side facing up. Measure in about 3/4 inch from the edge and make a dot with a pencil. Center the other half of the velcro tab over that dot and stitch all the way around.

Select a decorative button to sew on the right side of the patchwork from the velcro tab.

Try on your new coffee cozy!

Enjoy your coffee to-go in style!

Simple Makeup Bag Tutorial

What girl wouldn’t want to carry such a pretty makeup bag? Would you like to learn how to make this so you can carry one yourself or give it to your bestest friend for a gift?

This particular bag has a little secret – fusible vinyl on the inside! That is my little twist on this common bag, so I will show you how to do it.

Supplies:

Fat quarter for outside – I used a cute toile print by Jennifer Paganelli.

Fat quarter for lining

Batting or interfacing

Fusible Vinyl – I used Therm-O-Web Iron-On Vinyl (from Joann’s)

7-inch zipper

Usual sewing tools (ruler, rotary, thread, iron)

Note: use a 1/4 inch seam allowance throughout this project.

Cutting:

1. Cut out your outside and lining fabric 9-1/2 inches wide x 5-1/2 inches tall.

Cut out your batting or interfacing 9-1/2 inches wide x 5-1/2 inches tall.

Cut out two pieces of fusible vinyl 9-1/2 inches wide x 5-1/2 inches tall.

Cut two pieces of either fabric 2.5 inches wide x 2.5 inches long or 2.5 inches x 3 inches long. (Feel free to use scraps for this step because the ends are going to get trimmed and buried in the seam allowance.)

Preparing the Pieces:

1. Position your outside fabric over the batting (or interfacing) and quilt. I did a grid of diagonal lines for this sample. My grid lines were a little over 1 inch apart. I also used a guide bar, which you can see in the photo below (positioned behind the needle and foot), to help keep the lines straight and even.

2. Make the same grid on the back piece.

3. To fuse the vinyl to the right side of the lining fabric, peel off the paper backing of the vinyl. Position the vinyl sticky-side down over the RIGHT side of the lining fabric and press with your hand to smooth it out. Place that paper backing shiny side down on the vinyl and hold  your iron over the area for a few second. Continue until the entire area is laminated. Turn fabric right side up and press each area again, just for good measure. (you can also follow the directions that come with the fusible vinyl)

4. Take one fabric tab and fold the short end over about 1/4 to 1/2 inch. (use your judgment here in the amount you fold over, depending on the size of scrap you’re using.)

Now, fold in half the long way to create a sort of pocket.

Insert one zipper end into tab so the fold meets with the end of the zipper teeth. Top stitch close to fold to attach to end of zipper. Repeat for other side of zipper. (At this point, don’t worry about any long excess fabric on these tabs. They will get buried in the seam allowance and trimmed to reduce bulk.)

Bag Assembly Instructions:

1. Fold outside front piece in half to find the center. Fold the zipper in half to find the center. With zipper pull on left side and face down, position zipper over right side of front fabric, using those fold creases to center it, and pin.

Put a zipper foot in your sewing machine and stitch zipper onto front fabric.

2. Position this piece-in-progress face down over one of a fused lining piece, which should be right side up. Pin in the seam allowance (so your pin holes are hidden in the seam allowance), and sew along that stitching line. At this point, everything will feel quite slippery because of that vinyl. Just hold the pieces together and go slowly to keep an even stitching line and keep the raw edges lined up.

3. Snip off the excess fabric from the tabs. At this point, here is what your piece-in-progress looks like when you open it up.

4. Position your piece-in-progress over the back fabric with the outside fabrics facing each other. (zipper will be face down) Pin and stitch.

5. Align your piece-in-progress over the final lining piece with the lining fabrics facing each other, pin in the seam allowance, and stitch. This is what your piece-in-progress should look like now, with all four pieces sewn to the zipper.

Here’s the lining side. (I couldn’t resist adding one of my new labels printed by Spoonflower!)

6. Open your zipper all the way. This is very important so you can turn the bag right side out and through the zipper opening when you’re all done with the assembly.

7. Lay out your piece-in-progress so that the outside fabrics are right sides together, and your lining fabrics are right sides together. Pin in the seam allowances, leaving a space in the bottom center of the lining. That is where you’re going to leave a hole for turning the bag inside out.

8. Stitch all the way around the bag, starting at the bottom center of the lining, and ending about 3 inches from your starting point (so you have an opening in the bottom).

Making a Flat Bottom:

1. To prepare the corners for a flat bottom, pinch a corner so the seams line up, making the corner look like a triangle. Measure 3/4 inch from one side of the triangle, and draw a line all the way across. Stitch on that line, which will give you a 1.5 inch bottom.

2. Snip off the corner, leaving a 1/4 inch seam allowance.

Repeat for the remaining three corners of your bag.

The Home Stretch!

Turn your bag right side out through the opening you left on the bottom of the lining and through the zipper you left open.

Hand stitch the opening closed. Fill with your goodies!

That’s it! Easy, right? I hope these instructions are helpful, and I hope you try making at least one of these fun little zipper bags! I would love to see a picture of your version.

If you’re interested in printing out this tutorial without using a lot of toner, I made a PDF with just the step-by-step instructions and one photo for reference.

Please don’t make this bag to resell, whether in your shop, at your local craft fair, or any other place.

Edit: Here’s a little plug for my shop to let you know I added this makeup bag and another pretty pink toile bag to the New Products section of my shop, in case you need a cute little gift but don’t have the time to make one yourself. I’m always happy to take a custom order too!

Best Practice – Customer/Reader Appreciation

“The customer is always right.” How many times have you heard that? I used to work in the retail industry, and I always rolled my eyes when I heard that speech. At the end of the day, I think every corporation, small business, and individual maker of handmade goods will tell you that customers (and blog readers) are the #1 most important element to their business (or blog).


I know, you don’t need to hear from me how important it is to appreciate your shop customers or your blog readers. Crafters are kind folks by nature, right?! Just look at the steady list of giveaways taking place every single week as proof of that.

I am not an expert in marketing, and I am generally a shy person when it comes to marketing, making it hard for me to drum up new customers or new blog readers. I try to appreciate the ones I have. I just wanted to share a few of the things I try to do, especially here with my blog.

Comments
If you have ever left a comment on my blog, you have most likely received an email from me thanking you for taking the time to stop by and leave a comment. I love comments. I love hearing from readers. That has also been the start to a few email conversations that have led to great friendships I cherish.

Offering Tutorials
I think tutorials are a cool way to offer your readers something for free. Who doesn’t love a free pattern?! I wish I were better at offering more tutorials!


Participating in Swaps
Exchanging supplies or handmade goods through swaps is a great way to meet people and share similar obsessions. Some of my blogger friendships began from swaps. (That reminds me, don’t forget about our Christmas in July ornament swap coming up.)

Interact and Engage
Sometimes I can be indecisive, so it’s good to know I can ask you all for advice, such as with my recent patchwork arrangements project. I loved reading your thoughts on which half-square triangle arrangement you liked best. I like it when other bloggers ask for an opinion or feedback because it initiates in a creative conversation, which is beneficial to all of us.


Surveys
Amy frequently posts surveys on her blog, seeking feedback on sewing topics or ideas for content she could offer. I love that! Personally, I think surveys are fun to participate in because they make me feel like I have a say, like I’m contributing to the success of another creative person. I’m all for that!

Giveaways
I adore this little matchbook notepad I got from Randi’s shop with a recent fabric order!


I am going to make a supply of these little drawstring bags to include in orders from my shop. Just a little something extra.


I mentioned above the number of giveaways that take place every week. I’m not telling you that you should do a giveaway. Just saying I like doing giveaways, whether it’s an extra goodie with an order, a giveaway for a blogiversary, or participating in a sponsored event like the upcoming Sew,Mama,Sew‘s May Day giveaway. (Be sure to check back next week for the giveaway I have to offer!)

This series has been fun for me to do. It has challenged me to take notice of and share the things I do to keep myself organized and to keep life running smoothly. It’s also been good writing practice for me. I hope you have found it to be useful in some way too.

– – – – –

Previous posts about my Best Practices:

Resources

Filing

Notetaking

Bobbins, Pins and Folding

Business Cards

Carry Your Product

Simple Tote Tutorial

I have always wanted post more tutorials here. I tend to make a lot of one-of-a-kind things because when I come across something that inspires me, I study it to figure out how to make it, and then just start cutting, forgetting to document what I did.

Every store I go into has it’s own version of a reusable tote, from the grocery store to the book store to the pet store. Lots of people are making their own tote bags because most of those store versions are so generic, stiff and just kinda ugly. I got a boring black tote bag from a swimwear store last summer that I used as a model for my latest tote bag obsession.

I thought it would be fun to share my version of a girly tote bag. I used single pieces of fabrics, but you could do so much with this size, from stripes of jelly rolls strips to a patchwork block framed in linen fabric.

Materials

One half yard fabric for outside and one strap (additional fabric required if you want the straps to match)

One half yard fabric for lining and the second strap

Cutting

Cut two pieces 13 inches wide by 14 inches tall from the outside fabric and from the lining fabric.

Cut two strips of fabric 5 inches wide by 24 inches long for the strap.

Sewing the Bag Pieces

Lay the two outside fabrics right sides together and sew together with a 1/4-inch seam. Turn right side out.

Lay the two lining fabrics right sides together and sew together with a 1/4-inch seam, leaving a two-inch opening in the center bottom of the lining. Leave the lining inside out.

Straps

Fold one of the strap fabrics in half, wrong sides together and press. Open and fold raw edges toward center fold and press.

Fold in half again so all raw edges are tucked inside, and press.

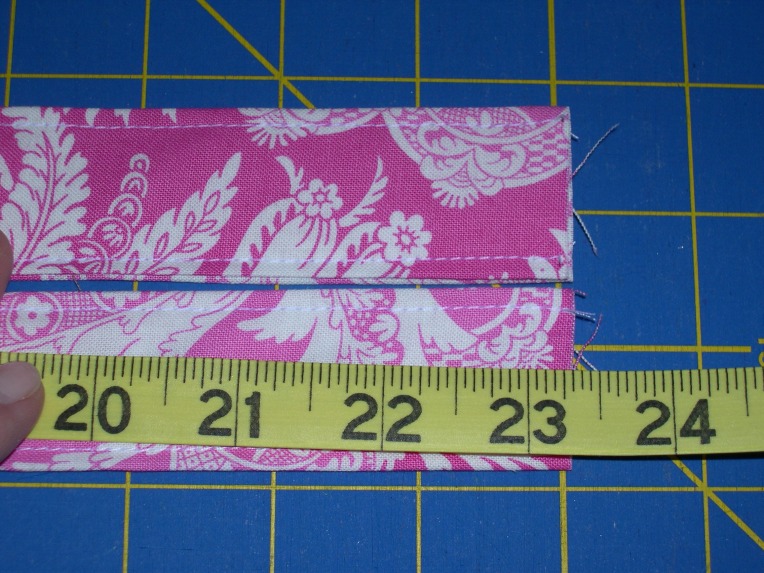
Top-stitch on each side, about 1/8-inch from folds. Measure the straps to gauge the length. Mine came to about 23 inches long, which was fine for me.

Attaching Straps

Measure 2.5 inches in from the left edge of the outside bag, and pin one end of the strap, leaving a 1/4-inch overhang. Do the same on the right side and pin the other end of that strap, leaving a 1/4-inch overhang, and pin, making sure the strap is not twisted. Baste in place using a 1/8-inch seam.

Optional: Making a Flat Bottom

To prepare the corners for a flat bottom, pinch a corner so the seams line up, making the corner look like a triangle. Measure 1 inch from one side of the triangle to the center seam, and draw a line all the way across. Stitch on that line, which will give you a 2-inch bottom.

Snip off the corner, leaving a 1/4 inch seam allowance. Repeat for the remaining corners.

Assembling the Bag

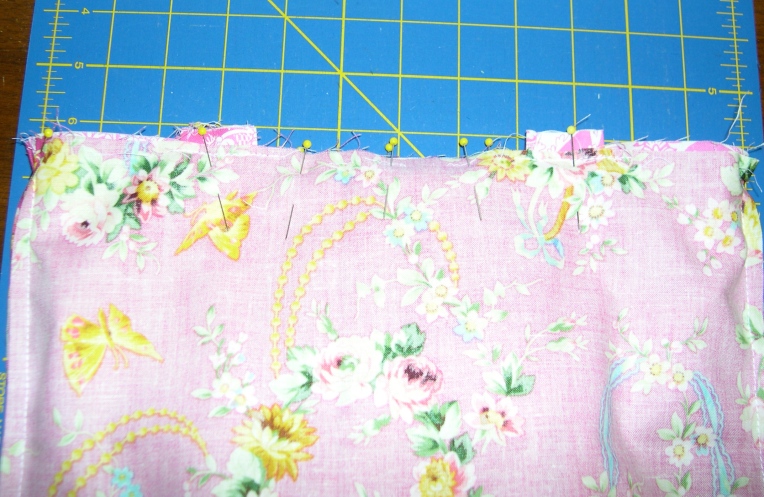
Insert the outside bag (which should be RSO) into the lining bag (which should be inside out), smoothing the layers together and making sure the handles are neatly tucked in between the two bags. Pin, pin, pin. Sew the two layers together with a 1/4-inch seam.

Pull the outside bag through that hole in the bottom of the lining fabric to pull the two bags right side out.

Smooth out the two bags so it looks like one long piece.

Tuck the lining inside the outside of the bag. Press along the top, and pin pin pin.

Top stitch the top of the bag to hold the layers together and give it a nice finish. I switched to pink thread here, just for fun. Then I decided to add some pink rick-rack over that top stitching for that extra little touch.

Whipstitch the opening in the lining fabric closed.

Put your stuff inside and show it off!

*****
If you want to print the directions without the pictures (which can use up so much toner!),email me at tadawilhelm@hotmail.com and I will send you a shortened version. If I can figure out how to attach a link to a pdf, I will add that here.

EDIT: the shortened instructions are here, thanks to Sandi who shared the easy instructions for adding a pdf to this post!

Enjoy your stylish new tote!