(Please ask for permission to use my photos from this post beforehand.)
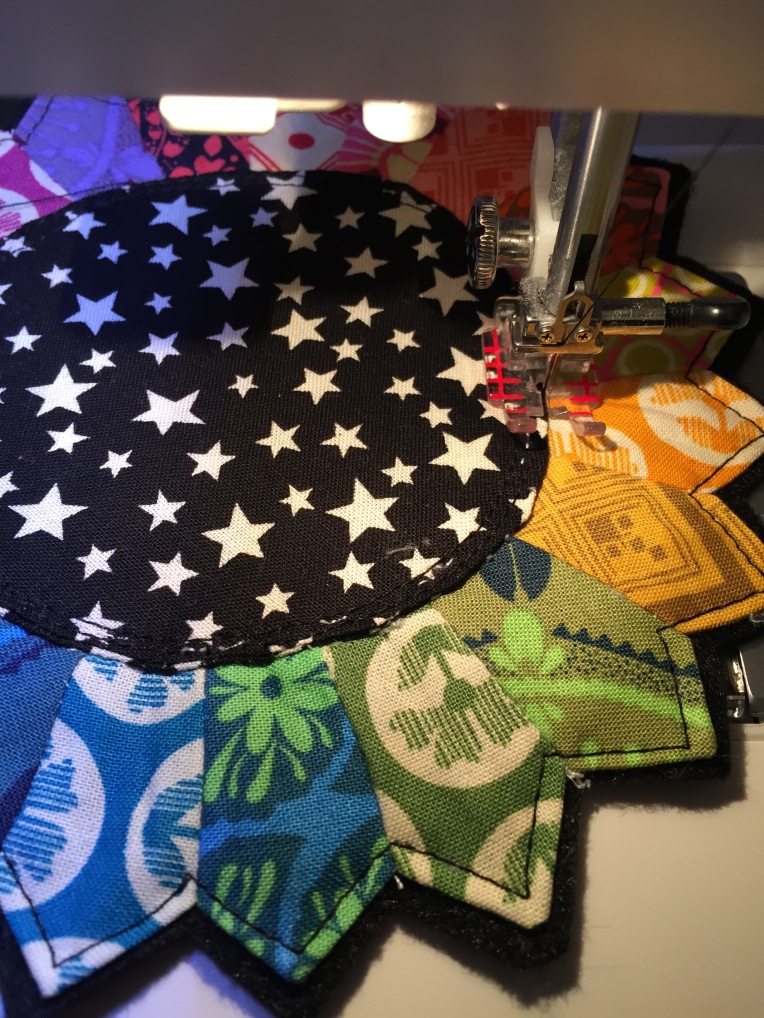
I had a lot of fun making mini Dresden color wheels this past week, so I wanted to share a quick tutorial on how to make your own. I backed this one with felt to use as a mug rug, which really brightens up my work space and makes me happy!
After choosing fabrics from your stash, cut about 20-21 wedges (I used 20 wedges in the sample above and 21 in the sample below – use your own judgment to see what you can make work), using one of the smaller measurements on the Easy Dresden Template designed by Darlene Zimmerman (got mine from Joann’s). For the examples pictured here, I used the 1-1/2″ and the 2″ positions to cut my 20 wedges.
Fold each wedge in half the long way and stitch along the top, using a 1/4″ seam allowance. Turn right side out to form a point at the top.
This is a great step to chain-stitch the pieces together. Lay each wedge right side together, and stitch all the wedges together to form a ring, using a 1/4″ seam allowance. Press seams open.
 Measure the inner circle and add 1/2″ to 3/4″ to each side for the seam allowance. Cut a circle from paper or plastic to use as a template; cut 2 circles from your center fabric.
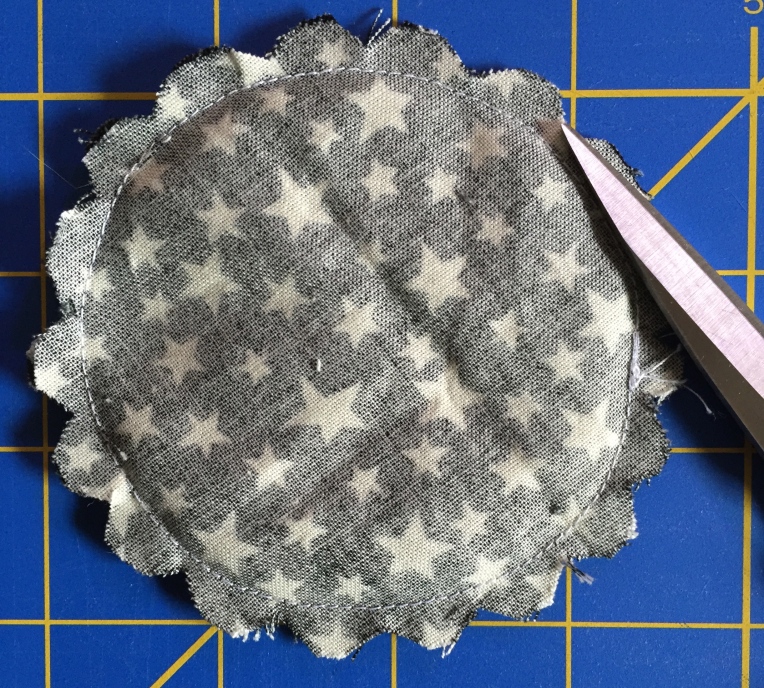
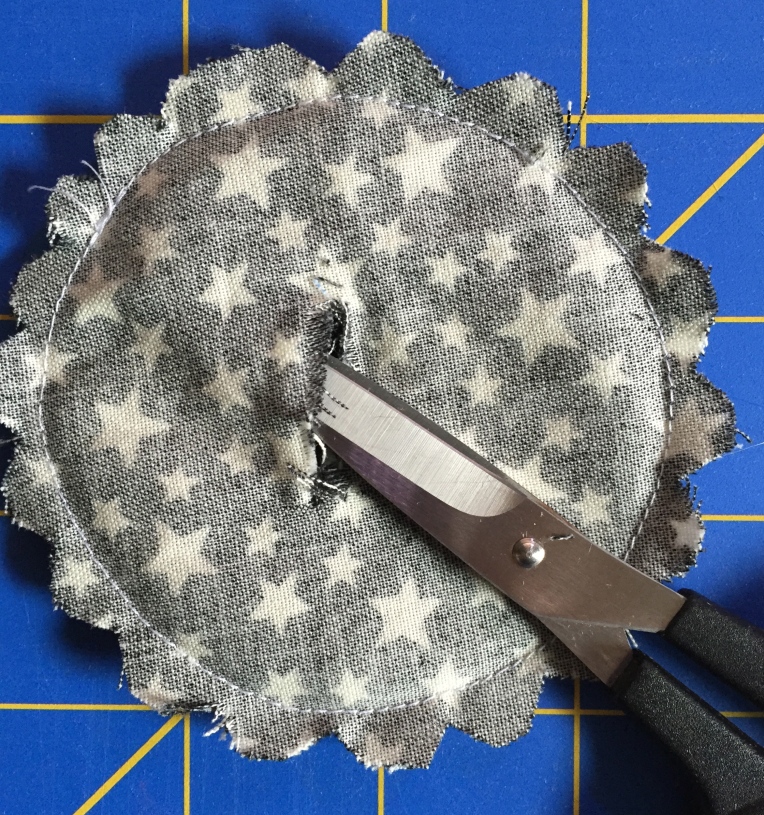
For these smaller dresdens, I cut circles that measured 4″ to 4-3/8″. With right sides together, stitch the two circles together using a 1/4″ seam allowance. Cut notches in the seam allowance to reduce bulk. Pinch the fabric on one side of the circle and cut a small slit. Pull the fabrics through that slit to turn the circles right side out. Press.

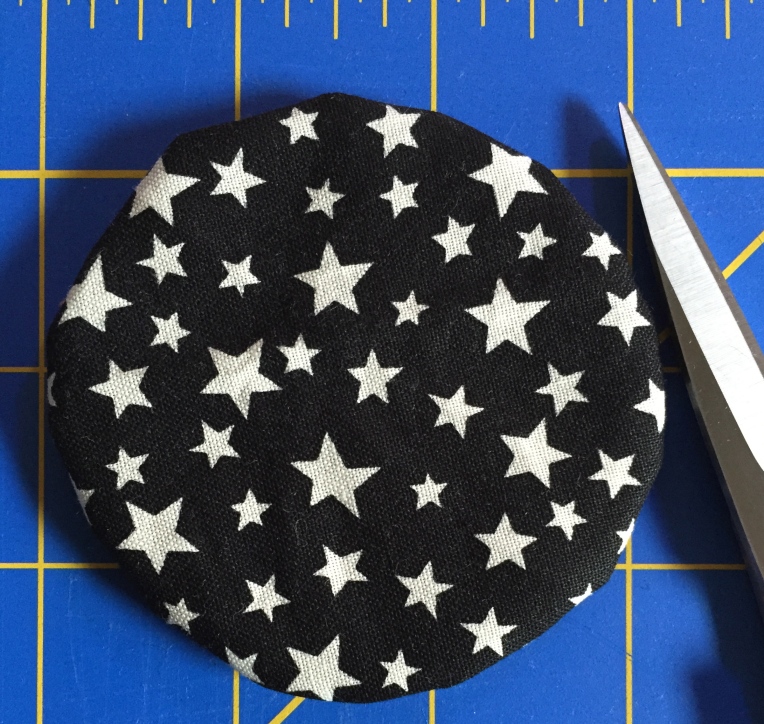 Lay the fabric circles on top of dresden ring, pin if necessary, and top-stitch to attach to ring of the wedges. I top-stitched twice to make sure it was secure.
Lay the dresden on a piece of felt for backing and top-stitch 1/8″ in around the points and valleys. Trim the felt close to the points and valleys.
Stitch in the ditch around the circle to fasten more securely to the felt backing.
Happy sewing, my friends!
Terri
PS – Note: Because I create with human hands, my cutting is never perfect. My sewing is never perfectly straight. My circles aren’t perfectly symmetrical or even. And I always have threads to trim. Please forgive me for that 😉 This is just a fun project I was excited to share. I’m sure there are many ways to make this; I’m just sharing my concept and process here.




Hi Terri,
Love em! Thanks, Sarah
Thanks for stopping by, Sarah! It’s a fun little project.
I have been trying to figure out how to make this and, thanks to Pinterest, now I know!! Out come all the scraps of material!!
I love this so SEW much! Hmmmm, “happies” for Gruber’s? Just a thought…
Thanks! They are fun to make. That’s exactly what I was thinking, making “Happies.”
Thanks Cindy! Oh yes, that’s what I was thinking too 😉 😉
So cute! My scrap basket is overflowing and these would be perfect to make with all those little bits and pieces. Thanks for sharing!
Thanks Pam. It was a fun project to experiment with the smallest dresden I could work with on the template. And fun to make it a small quantity for gifts. Hope you have fun with it!
Thanks I think I could make this. Alot easier then I thought is was great pic’s.
Love your pattern and your generosity for sharing. I’m glad to follow you and going to make a few.
Thank you! I hope you have fun making a few of these!
I LOVE your mug rug!! I’ve been looking for a small, adorable project to take along on a 5-month RV trip this summer–I’ve definitely found it. Thank you for sharing your creativity.
Thanks so much, Virginia! This was a fun, small project to whip up, especially in multiples as gifts for my sewing friends. Have fun making one for yourself! and have a great trip this summer!
I’m a Dresden fan and these are wonderful! Thanks!!
Great to hear! Thank you!
I have not been able to print this tutorial. Have been wanting some instructions but couldn’t find any until now. Thanks
Hi Sharon. I’m sorry to hear you are having trouble getting this tutorial to print. I’m not sure why. I use Chrome for my Internet browser, and when I click File/Print, it prints on 18 pages.
This will be fun to use up scraps; going to start Christmas projects this month and am adding this to my list – I too am unable to print the tutorial. .
Thanks
Thanks Cathy. Hope you get a chance to start your Christmas projects! I always remember to start in December 😉 I’m not sure why the tutorial won’t print for you. I use Chrome for my Internet browser, and when I click File/Print, it prints on 18 pages.
Thanks for your reply – I actually emailed it to myself and was able to print it from there – again thank you
I don’t like Chrome and never use it. Is there any other way?
So easy. Thank you
Thank you for sharing. I will be using this for holidays neighbor gifts
And a great process it is, too! Thank you for sharing this.
Thanks so much!
What a lovely idea! The imperfections add charm to the piece! It couldn’t be prettier! I’m going to try making some too!
Those are so cute, and very easy! Iove Dresdens in any form.
Thank you Terri.
Adorable! Thanks fir sharing! On my to do list! 😄
Thank you for a lovely project. It’s funny that my projects are imperfect too! And your tutorial lives on the internet to make many happy sewists!
These are gorgeous, thank you so much for sharing. I can’t wait to make one.
Thank you so much! Hope you love making one as much as I did!
Thanks! Your mug rug is very cheerful! I hope my stitching group wants to make some!
Thank you Debra! Hope you have fun making these.
I love these.. can’t wait to make them!!!
Thank you! Hope you have fun making them!
Omuh gosh am seeing sunflowers. Just tried this with scraps, lots of fun. Thanks for an easy simple pattern.
Looks Darling! Why cut 2 different sizes, tho?
Thanks. I made 2 different sizes so that’s why the 2 different cuts.
I love this tutorial. My favorite two things to work at…Dresdens and mini quilts/ mugrugs. Thank you for your blog!!
Nice!
Love these! One would never know you were human judging by your fine work. Circles are hard. I, too, am an imperfect species, but I hoop up two fabrics right sides together and select the circle on my machine. Often I use any ol’ scrap for one of the fabrics. I can do other tasks, like cutting strips, while the machine sews perfect circles. I make how many I need, then later while watching TV, I snip and turn just as you have shown in your excellent tutorial.
Aw thank you! Happy to hear. Sounds like you have a digital/computerized sewing machine – that can sew circles? That would sure make things easier. My machine is analog – old school.
Thanks! It is simply eye catching!
I can’t wait to try this! Thank you for the posting of the pattern.
This was a lot of fun to make. For some reason I ended up having to use 21 wedges, but it turned out great.
Lovely! Thanks for sharing this wonderful idea!
Thanks for sharing! I love it! I can’t wait make one and see it on my craft table! I’ve been waiting to find one I really like to kinda dress up my coffee cup. While crafting lol thanks again
Thank you for sharing. Was looking for a new project, found it.
Very cute! Thanks for sharing. BTW, assuming one does not have a circle cutter or ruler, or a sewing machine that will sew perfect circles with the touch of a button, just look around the kitchen. I bet there is a lid that is just the right size to trace without having to make a template from plastic or paper.
I used a plate to draw the original circle template and made a template from regular paper so I could reuse it over and over. I don’t have a computerized or digital sewing machine so no sewing perfect circles for me. I made these using very analog, old school methods.
Your last paragraph made me realize I can to this too. I can’t sew a straight line, can’t cut straight and the threads are everywhere! And it is cheaper than a therapist. Merry Christmas!
Yes, You can do this! It’s pretty easy and forgiving. No need to be perfect – just have fun. Merry Christmas to you too!
I can’t seem to make a circle that lays flat? Any suggestions?
Vickie, I’m no expert, but one thing I found that makes circles more cooperative is to pair your pretty quilting fabric for the circle with a lightweight, thinner, (cheaper?) cotton for the back. Even used fabric softener sheets can be used for the unseen back. Proceed as Terri’s tutorial indicates, and turn the circle after trimming the seam allowance. Use a bobkin or chopstick to make sure you have the edge smoothed out. Then spray starch and press.
Another method is to make your circles larger than needed, and sew a running stitch around the edge, using a cardstock circle as a template. (A cereal box is great for this.) Pull the thread to draw the circle snuggly around the template, and iron the fabric while still on the template. Pop out the template when you are ready to sew the circle on your project.
Pretty ideas and georgeous application!